Size Configuration
Jump to navigation
Jump to search
Navigation: User Guide ➔ Edit ➔ Project Configuration (cfg File) ➔ Size Configuration
| Edit Configuration Step 2 of 2 - Size Configuration | |||
|---|---|---|---|
| Size Configuration (Summary) | Sieve Series | Size Distribution | Measurements |
Related Links: Size Distribution (PSD), Size Distribution Definition
Introduction
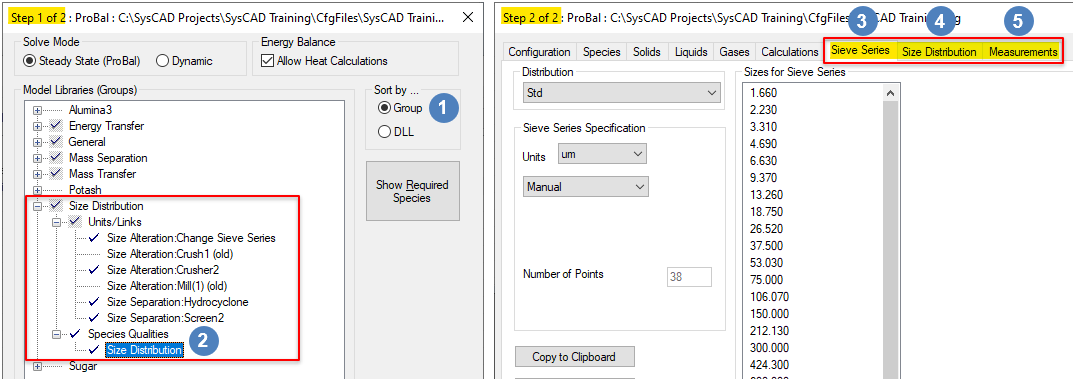
Size distribution set up requires the following:
- Size Distribution add on license option; and
- During Model selection (step 1 of Edit Configuration), select sort by Group
 and select the Size Distribution
  species quality model.
There are three tabs for size data configuration that will appear as part of Step 2 of Edit Configuration once the Size Distribution species quality model has been selected in Step 1:
Workflow
By default, the user is given a single size distribution when size distribution quality is added to the cfg file.
Workflow for Setting up the default size distribution is as follows:
- On the Sieve Series tab:
- Define the sizes for the distribution using one of the predefined methods or manually.
- On the Size Distribution tab:
- Set the relevant parameters (Bottom size, Interpolation Method, Species).
- On the Measurements tab:
- Check the default measurements for the size distribution, add or modify as required.
If user wants to add another size distribution to the project, then
Workflow for adding a new size distribution is as follows:
- On the Size Distribution tab:
- Press the "Add Distribution" button to add a second size distribution.
- Rename the Distribution
- On the Sieve Series tab:
- Select the new Distribution from the list.
- Define the sizes for the new size distribution using one of the predefined methods or manually.
- On the Size Distribution tab:
- Set the relevant parameters (Bottom size, Interpolation Method, Species).
- On the Measurements tab:
- Select the new Distribution from the list.
- Define the desired measurements for the new size distribution.
